Thursday, December 15, 2011

Best Potato Soup Ever!!

I found this recipe on Pinterest and just had to make it but of course I tweaked it so it isn't exactly the same as the one I found. 

Ingredients:

3-4 russet potatoes 
2/3 cup of sick butter
2/3 cup of flour
4 cups of milk
1 cup of heavy cream
1/4 cup of chicken or vegetable stock
5 slices of uncooked bacon
1/2 cup of sour cream
5 cloves of garlic 
2 bunches of green onions, sliced thinly
Colby Jack Cheese 1-2 cups
Pepper to taste

Wash and cut your potatoes into cubes place them into a pan and boil them for 15 minutes, cook bacon until no longer raw or however you like yours. You can either crumble your bacon up after its cooked or you can slice it up before you cook it. 

Melt you bacon in your soup pan once melted whisk the flour into the butter, once it is smooth with no lumps of flour are visible. Add your milk slowly and one cup at a time once all 4 cups are in the milk add the heavy cream. Put a splash of stock in the mixture. Add pepper.

Take your cooked potatoes and smash them up a little with your whisk, then add them to the cream mixture. Add onions and garlic bring mixture to a boil for 8 minutes and then turn heat down while stirring continuously.  Once the mixture is simmering add cheese, sour cream and bacon (I put the grease in with this too, I know not the healthiest :) 

Enjoy!! I didnt add as much cheese to the mixture while I was cooking it because I knew Tony and I would add more when we ate it. This isn't the healthiest but it is literally the best potato soup I have ever had!!

Some tips:
Because this is a cream based soup KEEP YOUR EYE ON IT!!! You cannot walk away from this at all because if you do it will burn. I let it simmer for about an hour after I finished everything keeping a very close eye on it. Don't cook the potatoes all the way either because if you do when you add them to your soup they'll turn into mush. 

Sunday, December 11, 2011

Some Big NEWS!!!!

If you aren't on my Facebook then this is totally new information for you and if you are than only part of this will be new :)..

I AM ENGAGED!!!!!! 

Like any girl I imagined it my entire life but never knew exactly how it would go down or who it would be and all I can say is I am so happy to get to tell everyone a funny story and look forward to spending the rest of my life with Tony. 

Tony and I opened our Christmas presents last night because next weekend we will have Tony's niece and the following Thursday I will be heading home to spend time with my family and Tony will be spending time with his, it'll be our last Christmas apart :)

I had opened all my presents and he had opened all of his.. He told me I had one left but I had to go get it from the car because it was to big to wrap, so reluctantly I walked down to his truck and was expecting this rather large box to lug back up to our apartment but I found a little tiny pink box on his console. I picked it up really confused as to why I had to get this wrapped box from his truck and started to walk back in side. Like anyone with a brain I decided to shake it box and noticed it made no sound, I knew it contained jewelry inside because it was that type of box. I then noticed it was really light, lighter then it should have been. So I decided ehh whatever I'll open the dang thing. IT WAS EMPTY!!! I am not going to lie I was a little irritated and doing all of this while walking back inside our apartment, he parked far away on purpose. When I came in the house I said something along these lines but I am cleaning it up for my viewers "You got me an empty box? Why did you get me an empty box for Christmas? I didn't get you an empty box" there was some f words in there I am sure you guys can place them appropriately. Once he told me he didn't know why he got me an empty box he told me to come closer and got down on one knee and asked me to marry him. I pretty much lost it and was bawling, it is for sure a moment I will remember for the rest of my life and I am looking forward to marrying him!!!

So to answer you questions it wont be until 2013 because I need to finish up school and get a job to pay for my wedding :)

I hope you guys all had a wonderful weekend!! 


The cuts on my hand is from who knows, I literally have no idea I was sitting in history class on Thursday and went to grab my coffee when I noticed that my fingers hurt and I looked at my hand and I had those three cuts there.. Super weird. Anyways Three more finals left and then if I was you I would be looking out for a give away on my blog :-)

Friday, December 9, 2011

Raspberry Lemon Thumbprint Cookies

These cookies are probably one of my favorite types of cookies to eat, they remind me of shortbread cookies. I love love love shortbread cookies!! I also like anything lemon so these cookies pretty much take the cake.

Ingredients:
makes 4 dozen

  • 1/2 cup raspberry jam or jelly
  • 1 tablespoon Chambord or kirsch
  • 2 1/4 cups all-purpose flour
  • 1 teaspoon baking powder
  • 1/4 teaspoon salt
  • 2 sticks (1 cup) butter, at room temperature
  • 2/3 cup sugar
  • 2 large egg yolks
  • 1 tablespoon finely grated lemon zest
  • 1 tablespoon fresh lemon juice
  • 1 teaspoon pure vanilla extract
Directions:

Preheat oven to 350 and lightly butter two cookie sheets. In other bowl combine jelly and Chambord and set a side. 
In another bowl combine flour, baking powder and and salt, wisk to combine.
Using your electric mixer combine butter and sugar until creamed. Add the eggs, lemon juice and zest and vanilla extract into the bowl and mix to combine. Add the flour mixture in two additions and beat until moist clumps form. 

Pinch off the dough to form 1-inch balls, place on your greased cookie sheets. Use your floured index finger or 1/2 teaspoon measuring spoon to create depressions in the center of each ball. Fill each indentation with nearly 1/2 teaspoon of the jam mixture. Bake until golden brown, about 20 minutes, these cookies can actually take any where from 12-20 minutes to cook my suggestion is to keep an eye on them when the edges turn a nice brown color they are done, pull them out and let them cook you do not want the edges to be a dark brown because then they will be too done and they will fall apart. Let them cool on the cookie sheet.


Monday, December 5, 2011

Chirstmas Cookies

Hi all!!! I decided to randomly post recipes for chirstmas cookies. Some of these recipes will be easy and some will be hard.


Cool-whip Cookies:
One box of your choice of cake mix any kind will work.
One container of cool-whip the small one.
Powder sugar to roll cookies in.
1 egg

Combine ingredients above and then roll into balls then roll in the powder sugar and place on a cookie sheet bake for 10-12 minutes. These cookies should be light and fluffy.


Enjoy!!

Saturday, December 3, 2011

Christmas Tree!!

This year Tony and I decided we would put up our first Christmas tree and it has turned into a very pretty arch enemy. It was all fine until one of our dogs started to take the ornaments off the tree, thankfully we didn't buy expensive ornaments. So we decided to "solve" this by moving all the ornaments up to the third branch so she couldn't reach them. We were outsmarted my a dog, she decided to get on the couch then onto the side table and pull a little pretty bird off and destroy it. I had felt and Styrofoam all over my apartment literally from one end to the other. It was not fun to pick up.. 

Then the caterpillars...
When we got the real tree we shook it off pretty good or so we thought, there must be some caterpillar eggs on the tree because the dogs have every so nicely put two of them on me which results in me screaming and throwing it off of me. Its a little tiny caterpillar and it feels oh so gross!!!.. 

Don't get me wrong I love having our tree up but I am pretty sure our dogs think it gets our attention more then they are (which it is not) and the little bugs on it gross me out!! I am going to buy a fake tree next year after Christmas so it'll be on sale.. 

Did I forget to mention that I am also allergic to it, if I stop taking my Allegra I cannot breathe and have to use my inhaler. 


I was totally going for Charlie brown too and the red skirt I know does not match but I couldn't find a cute tree skirt so I just grabbed the cheapest one I could find. 


Merry Christmas!!

My semester is almost over and I am so looking forward to doing some blogging and reading over break :)


Tony's niece is with us, she insisted on being in our photo :)


Saturday, November 26, 2011

Happy Thanks Giving!!!!


This Thanks Giving Tony and I decided that we would stay home for Thanks Giving and we had a really nice relaxing day. It started out with us getting up at 5 am to go get the paper to see what the Black Friday deals were going to be. Then we went back to bed, got up and didn't start cooking until 12, we ate at 4pm. I was super nervous about making my first Thanks Giving meal by myself but it turned out quiet nice and the only thing that showed me who was boss was the green beans. I turned my back on them and they were burnt :( but they still tasted okay enough to eat. 

We started our Black Friday shopping at 10 pm, we went to the Gap Outlet, Carters, Osh Kosh, Forever 21, Bath and Body Works, Best Buy and Cabela's. The only place we had lines at was Best Buy and Cabela's and I only got yelled at by one old guy at Cabela's because he thought I was line cutting, which I wasn't I swear. We got home at 5:30 am and went straight to bed..

Tomorrow we are getting our Christmas tree :) I have never actually went up to the mountains to get a tree so it should be fun. If I have time I will post some photos of our adventure!!

Happy Late Thanks Giving!!!

Saturday, October 29, 2011

New things at Laynie Bug Designs!!!

Melissa at LaynieBugDesigns on Facebook has become more than just an awesome lady to get cute hair accessories from, she's my internet pen pal :). Through doing reviews and other various things for her on my blog I have developed the kind of relationship that one can ask favors of, in the hair accessory department.. 
So to start my little review off here is a story. 
I found a DIY tutorial for a braided headband that was made out of an old t-shirt on Pinterest. I pinned it with the thought of "I'll make that some day when I am not in school..." Then Tony and I went to the Homecoming game for my University and I needed to wear something white, seeing as our shirts are grey it didn't really go with the stupid requirement of wearing white. So I dug into my pinterest and found the braided headband and decided I was going to knock one out the night before. It was successful but I had to tie mine in the back, the next day it dawned onto me that Melissa would be able to do wonders with this tutorial and I was right (she doesn't use old t-shirts though to make them)!!!

Here is the braided head band.

$6 a piece or 2 for $10


What I love most about these is it doesn't feel like you have anything in your hair at all, they do not fall out. Usually headbands will slip right off my head which is amazing because I have a crap ton of curly hair. They add something fun yet subtle to your hair and you can wear them with a flower or with nothing at all, with your hair up or down!!

The other new thing that Melissa has came out with is the in the last couple of months and I got the joy of trying out is the elastic headbands and hair ties. These things are pretty amazing, I like that the hair ties do not cut off your hair something that is really common for hair ties to do if you constantly have your hair up is that they will eventually break your hair off. These are strong enough to hold your hair in place yet too weak to cause breakage. 

Headband price... good question comment below Melissa and tell us!!!

Hair ties are $1 each.. 

I LOVE the headbands because they are smooth and flat, perfect for attaching a flower to if you want and they also do not slip off your head. They're also hardly noticeable like the braided headbands, I really like these and will probably be buying more in the future. They are perfect for just getting your hair out of your face..


Through my obsession with pinterest I also found an awesome way to get lift at your crown without having to tease your hair I am not a big fan of teasing I like when other people do it to me like my fabulous hair stylist and when other people do it to themselves but me doing it to myself is a no. It probably has something to do with the fact that I am lazy and that I am to afraid to do it to my curly hair because I never straighten it :)

So I thought I would share this one with you!!

I always pull my bangs back into a little poof so you totally do not have to do this step. But your going to start by gathering the hair right at your crown like you are going to tease it except you are going to push it up and clip it with a small clip, I leave the front sections around my face down, when you've done this it should look something like the photo.. 


You are then going to gather your hair into a ponytail or messy bun and get it as close as possible to the little clip you placed into your hair. Once the pony tail or messy bun is secured then remove the clip and you have volume at your crown like you teased it!!

End product....


Excuse my tired look in all of these photos I got up early this morning to write a paper on Van Gogh and then I am going to school which I hate doing on a Saturday to get a depressing fitness test for one of my classes :(.. 

Happy Halloween weekend!!!

Friday, October 28, 2011

New Yummy Recipes

I found these two recipes on Pinterest and twisted them a little to make them my own. They where so good I decided to take some time out of my Friday to share them with you guys :)

This one is a super simple desert that I made even easier by buying store bought cookie dough. 

Cookie Dough Cheesecake Bars

Step one: 
Spray 8 or 9in square pyrax or metal oven safe container with cooking spray
Combine 1 1/2 cups of gram cracker crumbs with 5 tbsp of unsalted butter
Bake in oven for 6 minutes on 325.

Step two:
take 10oz of room temp cream cheese and combine that with 1/4 cup of sugar mix with blender until smooth then add one egg and 1 tsp of vanilla extract. Set aside, when cracker crumb mixture is out of oven and cool poor cream cheese mixture over the top. 

Step three: 
Take a small tube of store bought cookie dough and take hunks of the dough flatten them into disks/mold them into the shape of the pan and then put them over the cream cheese lightly. I let my cookie dough sit out for a bit while I was doing the two steps up above. Cover majority of the cream cheese with the cookie dough mixture. 

Bake all of this for 30 minutes or until the top feels firm and when you shake the pan it doesn't giggle anymore.
This last step is a must once the bars are done baking and have cooled down where you can no longer feel hot heat on the bottom of the pan REFRIGERATE before consuming or you will have nasty bars and you will ask why you baked this. At least that't what I did, these bars taste 10 times better if allowed to chill in the fridge for awhile. 

If you want the original recipe because I did not follow the exact instructions go here!!


Slow cooker Chicken Papikash Recipe

This is such an easy dinner to make, I made it just this last Wednesday before heading to class and when I got home all I had to do was make the noodles!!

Step one:
Combine 15oz of tomato sauce and tomato sauce can full of water with one can of green beans and one can of corn I rinsed and drained the corn and green beans. Add one small onion. Take Mexican chili powder, cumin, 1 dash of red pepper flakes, black pepper and paprika add those spices to your liking. (I went of the normal recipe here because it only called for salt, black pepper and paprika which did not sound very tasty to me.
Mix that together.
 Add frozen skinless chicken breasts or thighs (can use fresh, I just didn't have any so I put two frozen breasts in) to mixture, cook for 4 1/2 to 6 hours in your crock pot. 

Step two:
Check on your mixture at about 5 1/2 hours, that is when I noticed my chicken was cooked, ladle out 3 to 4 ladle fulls of the juice and SLOWLY combine it with 3/4 cup of sour cream. You do not have to do this step it just mild's down all the spices so it is not as hot, the reason why you cannot add the sour cream directly into the crock pot is because the sour cream needs to be tempered so it does not curdle and become nasty.  
Turn your crock pot onto warm if it has that setting or turn it off and keep the lid on it.

Step three:
Bring water to a boil on stove and add egg noodles cook until done, about 10-12 minutes of boiling.
Once noodles are done and drained, place noodles in bowl and top it off with the crock pot mixture. 

Enjoy!! 
This made enough for two people and for Tony's lunch the next day, it was pretty good.
If you want the original recipe, because once again I did not follow it go here!!


Hope you all have a safe and fun Halloween!! 

Want to follow me on pinterest or receive an invite to join this addiction leave you email address as a comment and I will send you an invite :)

Sunday, October 16, 2011

Smashbox and Urban Decay Review

Before school started I had intentions of wearing make up to class every day, my reasoning was I needed to start acting like an adult aka looking professional so it is a habit when I start working.. I figured that using a tinted moisturizer was going to make it easiest on myself. So I started out with e.l.f studio tinted moisturizer that I picked up from Target for 3.99. It was horrible, it was to dark it smelt nasty and it wouldn't every absorb into my skin all the way which left my face looking incredibly greasy. It was gross!!


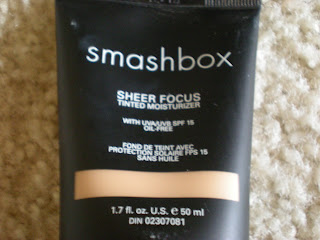
So I gave up hope on being an "adult" until I bought Smashbox's tinted moisturizer called shear focus I was really reluctant at buying this because of it its price I didn't want to spend money on something that wasn't going to work on my skin and that I would just end up throwing away once I figured out how much of a waste of money it was.  But this I can honestly say was worth all $30 I spent on it, it doesn't stink, look weird on my skin or make me feel like I have a mask on. It is build able which is nice and you don't have to set it with a powder unless you want more coverage. Without setting it it is a shear coverage similar to what you would get with a mineral powder foundation if you set it with a powder it is full to medium coverage which is more than I am used to. I have this in the shade fair but now that my tan has faded and I am becoming pale again I would probably be more in the luminous shade. Smashbox offers five different shades which is helpful because you will be more likely to find your correct shade. The other good thing about this product is that it has an SPF of 15 and doesn't cause a white cast when photographed. 
I would definetly recommend this brand and specifically this tinted moisturizer to a friend which is probably why I am recommending it to all of you!! If you are in the market for a tinted moisturizer I highly suggest this one. 

In this photo I have Smashbox shear tinted moisturizer on with MAC's Mineral Skinfinish Natural in the colors  light and medium, I use the medium as a bronzer on my cheeks and temples. Then my blush is Mary Kay mineral blush in Strawberry Cream. 

My next new favorite product is the Urban Decay Naked eye shadow palate. I love this palate simply because it is a great combination of browns and coppers as well as black. You can create a variety of looks with this palate anything from natural make up to a good smokey eye. Its really versatile and worth the money because it is sooo pigmented you only need a little to go a long way, I have a feeling I am going to have this palate for awhile. The brush that comes with the palate is really good it is a stiff eye shadow brush so it is good for defining areas and smudging under the eyes, I think it would be good to use for eyeliner with a dry shadow but I haven't tried it yet. It's also a good brush for packing. The palate is $48 again totally did not want to buy this palate simply because of the price but I swatch'd it on the back of my hand and could see why it was that price that and Tony bought it for me as a gift. I would recommend this palate if you can afford it if not I know there are better alternatives like physicians formula shimmer strips they are only $10 and they are geared toward your specific eye color to help them pop. I know they are pigmented and a good product overall. 

I wish I would have done a look for you guys with this palate but I don't have the time to wear make up to school let alone do a look for you guys. I am putting it down on my list of blogs to do in the future.. 


Friday, September 23, 2011

Sirius Skinsonic Review


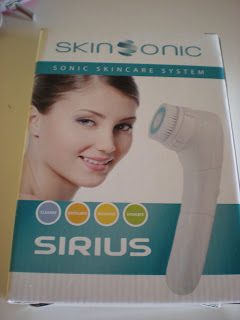
I have been wanting to buy this product literally about 6 months but I seriously had some major doubts about its ability to clean my face better than I could do on my own. So I couldn't justify spending the $49.95 on the product but I am so happy that I did. 

I have only had my Skinsonic for two weeks but I already swear by it, it has made my pores look so so much smaller around my nose. It also has made my skin mega soft,every day I use it just washing my face it feels like I just did a microderm treatment to my face. I can use it in the shower so that is a major plus because I don't like to "toss" water on my face and don't see the point in wasting a wash clothe when I have this amazing little tool now!!


The company is one that I would definitely order product from again, simply because I did not have to pay shipping or pay for taxes on my order. I got my package within a week of ordering it, the instructions that came with it made it very clear how to use it and how to properly care for it. You have to replace the brush heads every three months but you get three replacement brushes for $14.95. All the pieces that come with the brush are replaceable which is a huge plus, they all cost the same and they come with 3 to an order.

I think the best thing about this is that Tony is even using it, he is a mechanic and he gets pretty dirty at work so by the time he gets home most nights he is in dire need of a shower and to wash his face. A lot of the improvements I have seen in my own face, I have also seen in Tony's face but it has been more noticeable. His pores where a lot more clogged than mine (considering that boys do not care about their pores) I can barely see them now I noticed that about a week after he had been using it. I know he doesn't use it every time he washes his face too so that shows how well this product works. 

I use my Skinsonic with Mary Kay 3 in 1 cleanser in normal to dry. Not only does this product work good with just basic washing of your face but it makes a micro treatment so much more effective and you can apply lotion with it. The other benefit to this tool is that when doing a micro treatment it feels less gritty on your face. 


 This is what is included in your purchase when you order the Skinsonic. You get a docking station that holds the handle portion of the Skinsonic which is the last thing you see. You get a microderm attachment that is used to massage your treatment into your face, you get a normal bristle head and a sensitive skin one that is just made with softer bristles. You get a toner attachment that is supposed to increase blood flow to the facial muscles and increase the tone of your overall face(I have not used this attachment yet) and you get an attachment that helps apply lotions. The last attachment that I mention tends to soak up your product a little bit but because I do not use an expensive lotion on my face I haven't really noticed having to use more or less of this. I have noticed that I do not need as much face wash which is a plus!!!

So overall if you are considering purchasing any of these similar face washing tools I would HIGHLY recommend the one that Sirius makes over all the other products out there. I feel that you get more attachments for a lesser price. 
Check it out here:

DISCLAIMER: The following blog reflects my personal experience with the mentioned product(s). I have no affiliation with the company(ies) represented nor was I paid to endorse the said products. This is my honest opinion. All were purchased with my own funds.

Friday, September 9, 2011

Coming from the long lost land of school...

Have you ever felt like asking the universe or whoever controls time for a couple more hours a day??
That is my current question right now, can I store all my "free time" from the summer and add it to the days I need extra time in? That way I wont be behind on my blogging, YouTube or TV..
I know, I know I sound pathetic but when you are so busy with homework you catch yourself imagining your are swimming in assignments.. You have an issue.

So to cope with my lack of extra time I have built in rewards to my week :)
Tuesday and Thursday is Starbucks day :) I am especially cashing in on this one right now because the pumpkin spice latte's are out again :) and my third reward is Bagel Friday.
See I have history on Tuesday and Thursday and to literally get through that class I need some caffeine.. And well lets face it who doesn't like a good bagel? So I just built in an excuse to get one :)

I have been really stressed out this semester(only 2 weeks in) carrying 18 credits is not an easy task.. I have found myself more snappy, grouchy aka poor tony :( he is trying to make light of my situation and I dont' think its very funny. Well I kind of do looking back on it right now but in the moment his jokes don't make me laugh they make me want to punch him.. 
So solution.. 30 minutes on the elliptical a day gets your endorphin's flowing and you are less grouchy.. It seriously works people trust me and there is an added bonus of getting to tell yourself your a skinny bitch :-)..

My whole purpose in writing this blog was to share some photos with you of the hot air balloons I have been looking at every morning going to class. It makes driving to class way more enjoyable I wish they where out every morning, it also makes me miss Boise really bad :(. 


Sorry my blogging will come less frequently for the next 14 weeks but I am going to be compiling a list for when I get ideas I wont loose them and maybe that'll help me blog more :) at least I can hope..

Wednesday, August 17, 2011

Mmmm PIE!!!

I love watching anything on TV that has to do with food especially shows like Man vs Food on travel channel and Dinners, Drive In's and dives on food network those are two of my favorite show. 

I was watching this episode of Man vs Food and thought I have to make this pie!!!
Make sure you scroll to the bottom of my page and pause the music player..


So I did and let me tell you its pretty freaking amazing :)

Here is what you are going to need..

Pie Crust
(this can be from the store or home made I was being ultra lazy so I used store crust..)
1/2 Cup crunchy peanut butter 
1 Cup powdered sugar
1 Tbsp Cocoa powder
1 pkg of instant vanilla pudding
1 Container of Coolwhip

Bake your pie crust and let it cool completely.
Then make your vanilla pudding and put in the fridge

Then take the powdered sugar, cocoa powder and peanut butter and mix together until it forms into crumbs.

You are then going to put a layer of the peanut butter mixture down into the pie crust I put about half in and then you are going to get your vanilla pudding out and place it on top of the peanut butter mixture. 

Once you have the pudding in the pie crust you are then going to put the remainder of the peanut butter mixture on top of the vanilla pudding. You could put half of what you have left on top of the pudding and then the other half on top of the cool whip but since mine was going to be to covered in the fridge and not ate quickly I just put it all on the pudding. 
Once you decide what to do with your peanut butter mixture you are then going to want to put the cool whip on top of the pudding/peanut butter mixture. 
If you want to get real ambitious you could make home made whip cream and use that instead. 

Refrigerate your pie for an hour or two and then enjoy!! :)


Tuesday, August 9, 2011

Small roots..


Going home is always a nice escape from where we currently live.. Tony and I headed up to Oregon on the 30th and came back to Nevada on the 6th of August..

I always love going home to see friends specifically Rachel and her kids you might recall her from a blog I did on her a couple months ago. If not you can go here and read all about Rachel :)


These kids are something special that's for sure.. They change so much when  I am not home. It does make it exciting to go home and see how they've changed but then again it makes me a little sad too because I dont get to see them nearly as much as I want to. The boys are reading and learning so much now makes it feel old because I remember helping teach them how to count, potty training them and just remember them being little babies and now they can count beyond fifty. Hailee.. the little princess reminds me of the boys when they where 2 so its interesting to get to compare them. Plus she gave me lots of free make overs so I was looking pretty amazing at home with my "make up" being done..

Cupcakes <3

You wouldn't be reading my blog if I didn't talk to you about food.. 
There is a little bakery in Richland, Wa called Frost Me Sweet, Obviously they specialize in sweets specifically to die for cupcakes. I am going to be dreaming about this place till I go home. The ones we got where maple and bacon(to die for), cookies and cream, red velvet, chocoholic and strawberry white chocolate etc.. Don't worry though I didn't eat all of these by myself although I really wish I had :)

Coffee <3


I love coffee.. as all of you know so I had to get coffee from all my favorite shops at home, I wish we had some good local coffee shops where we live but we dont so I just drink Starbucks when I am in Nevada. But there is something about a caramel latte from Moxie Java in Boise Idaho that just tastes so good, same with a Dark blended sinful(caramel, chocolate sauce and vanilla) sooo good.. I wish we had good little coffee shops here!!!


Going home it took us a long time because we messed around in Boise took the dogs to the dog park to tire them out so they didn't go crazy for the last part of our trip home. I should've taken a picture of the truck loaded up to come back because we brought my couch back down here and then everything else we got up in Oregon because they have no sales tax..

Sunday: relaxed
Monday: saw the kids
Tuesday: took Dillon and Zane to lunch and the park :)
Wednesday: went to Washington got cupcakes and tortured by the dermatologist.
Thursday: Went to dentist and got tortured by him..
Friday: Took our dogs to the vet :)

Over all it was a very successful trip home to Oregon. We took some photos while we where up there so eventually you will see some changes to my blog and I will share those with you a bit later :). I start school in three weeks :( so I am going to be knocking some blogs out of the way that I have been putting off. Look out for photos of clothes I bought :) and changes to the blog!!!

Happy Tuesday Everyone!!

Friday, July 29, 2011

Evy's Tree Review


Evy's tree sells their hand made sweatshirts and shirts off of Etsy it is amazing!!!
I first learned of this company from Dear Lillie when she did a give away for the company on her blog. 

These sweatshirts would be absolutely perfect if you had a little girl and then the ones she designs for women are just pretty much to die for.. It adds that extra something to a sweatshirt to make it more, kind of like spicing up your typical sweatshirt and jeans day. And if its what you are looking for then.. it can totally be achieved with one of Evy's Tree wonderful designs.  

One of the things that made me hesitate from buying something from this company was the price but I looked through their sale's folder and found something I pretty much couldn't live without. Once I bought it I pretty much couldn't stand myself long enough to wait for it to arrive in my mail box.. Its what I get for not being a patient person :).. But it was WAY worth the wait. and I totally understand and accept the price now.


That's my most prized possession right now.. Evy's Tree uses a high quality of fabric it is super super soft and way comfortable.


When I took the sweatshirt out of the package I knew my money was way worth it when I saw how they presented their product to the customer. Anyone who is going to take enough time to put that much detail into a sweatshirt shipment has to be worth it. 

Once I had purchased this off of Etsy but before I received the package I went and looked to see if they had a Facebook page and what do you know they did. I started seeing on there everyone talking about these satchels they put with their sweatshirts when they ship, it makes your package smell amazing at least that's what I was reading. Everyone was right when I took my sweatshirt out of the package I smelled it and it smelled like lavender but I couldn't figure out where they had attached it. And then I found it :)

The wonderful packet that makes your purchase from Evy's Tree smell like heaven :)


Over all this company is definitely someone I will keep an eye on in the future. I love their designs especially the ones with just the flower details on them. They are definitely worth the money and it is something I know will be able to remain in my closet for years to come because of the quality and attention that is put into the product when being made. I cannot wait for their fall collection to come out :) not to mention I have an on going list of things I would love to have from their shop. 

So what are you waiting for.. GO CHECK THEM OUT!!!


Monday, July 25, 2011

Beer Bread

Last summer we had some beer bread at a friends house and when I asked for the recipe I found out that it came out of a box :( so I went on a search for a recipe because I have no one to buy a tastefully simple beer bread mix from..

This is what I came up with..
1 (12 fl oz) can or bottle of beer
3 cups self rising flour
3 tablespoons white sugar
1/4 cup melted butter
We never have self rising flour so I just make my own
add to this 1 tablespoon of baking powder
1/4 teaspoon salt. 

Mix all your dry ingredients 
(flour sugar and baking powder/salt to make own self rising flour)
Then pour the beer in and mix until all the flower is wet you want all the lumps to stay in the batter so DO NOT beat it till its smooth. 
Poor batter into a greased bread pan and then let it sit for 30 minutes this will make the bread lighter and not so heavy. Then poor the melted butter on top before you put it in the oven.

You want to bake this at 350 for 55 to 60 minutes depended on elevation.
When I made this on Friday I believe I only cooked it for 45 minutes and it was done. 

Tony constantly asks me to make this for him. I have used a wide range of beer in it from Coors original to blue moon. It just gives the beer more of a hoppy taste if you use a darker beer. I do know though do not use corona in it some of the reviews I read people had used it and it gave the bread no flavor. You can add cheese into this batter with jalapenos as well as putting garlic on top while it is baking.

I hope if you try this you enjoy it!!


Just for you guys to see the difference and benefit in letting it sit


We ate it too quickly soo no after photo sorry!! 
I really wanted to share this recipe with you guys so I didnt wait till I made it again to share :)


Thursday, July 21, 2011

Brownies :)

I got bored yesterday and decided to bake.. 
I got this recipe from All Recipes and you can find it here.

I didn't change anything to much on it but took some advice from the comments, since it called for a 13x9 pan and people said that if they made the recipe in a 9x9 it turned into a hard brick I halved the recipe and put it in a 9x9 and didn't have any problems. I also used half brown sugar and half white sugar... I might have added a little extra chocolate chips. 

This is literally the easiest home made brownie recipe I have ever found, so easy I mixed it all by hand :)


Once you've mixed the eggs, sugar, vanilla and butter together this is what you should get.


You're supposed to sift the flower and cocoa powder together but I whisked it in the bowl and it gets the same effect, although if my catering teacher from high school saw what I did I would've more than likely got yelled at. 


Yumm.. I hope if you try this it turns out good for you too.. The chocolate chips in the recipe all sink to the bottom and create this chocolate fudge layer at the bottom its so good :)

Monday, July 18, 2011

Wine tasting!!

I turned 21 on the 12th and went wine tasting on the 16th.. 
I do not like wine!!!

Tony and I went because my mom was down visiting, she's the one that likes wine.. 
That and it was nice to get out of where we live for the day.

We went to a place called Apple Hill its mainly just a conglomerate of farmers that belong to the same organization. I really wanted a caramel apple but the fudge factory was closed :( so we are going back to get one after labor day :)..


Lake Tahoe


Mom and Rene Car photo!!


Hope all of you had a nice weekend too!!